
How to Remove Vinyl from a Shirt — 7 Methods That Actually Work
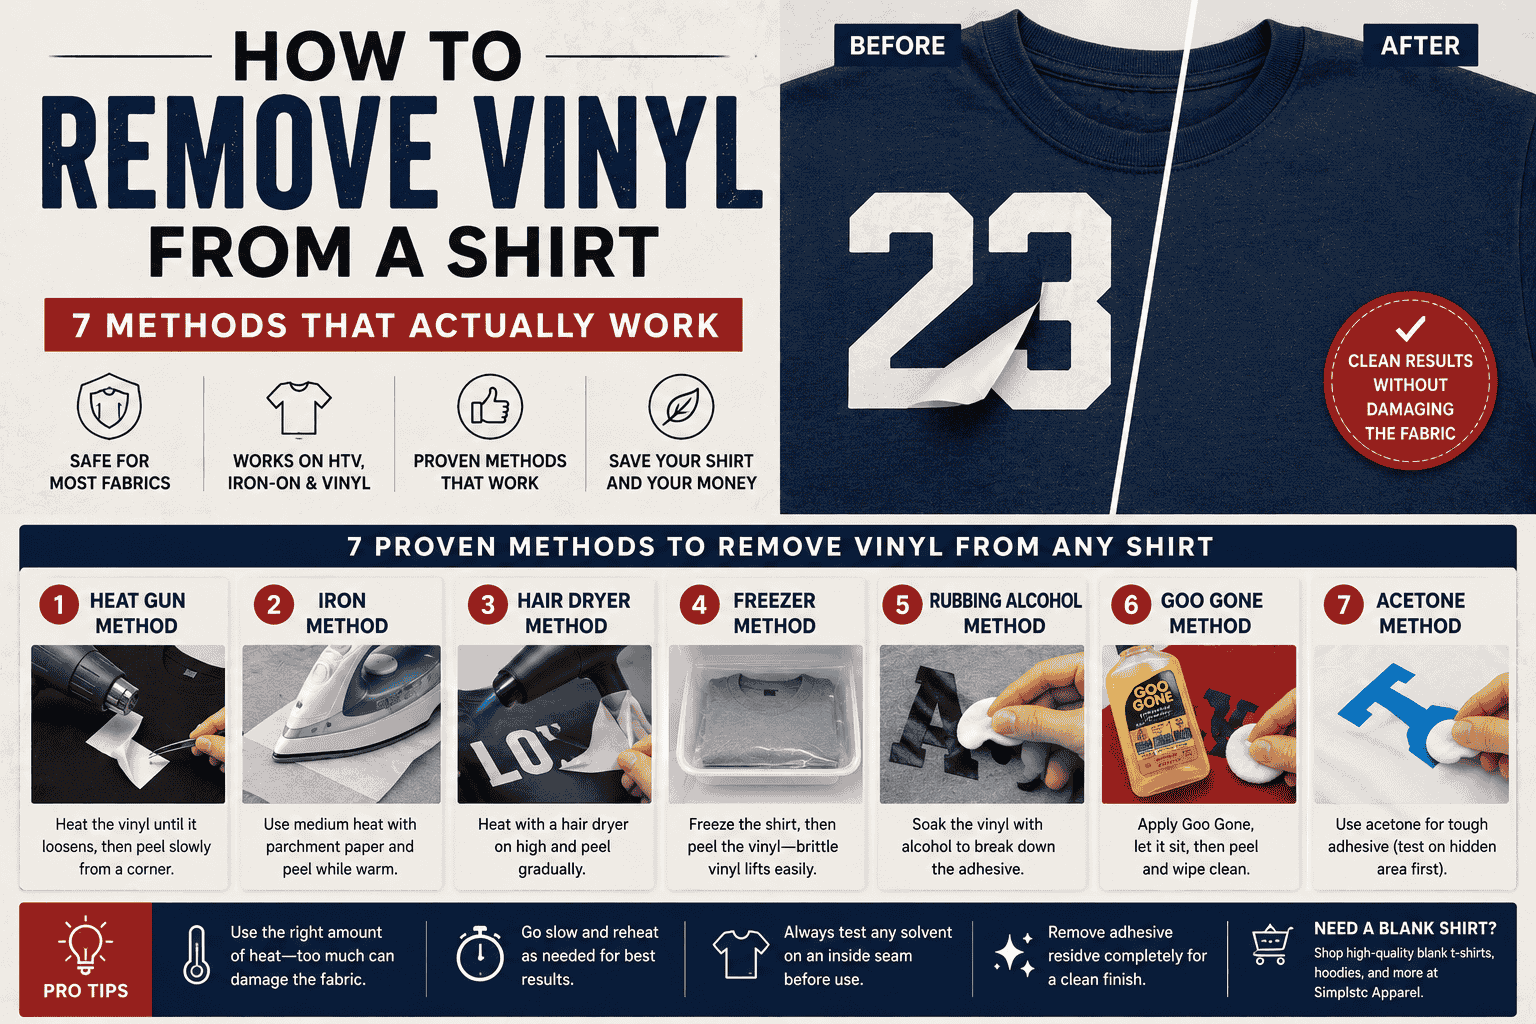
Quick answer: The best way to remove vinyl from a shirt is heat. Use a heat gun or hair dryer to warm the vinyl until it loosens from the fabric, then peel from a corner using tweezers or your fingernail. Work slowly and reheat as needed. For residue, rubbing alcohol or Goo Gone removes adhesive without damaging most fabric types.
You printed the wrong name. The design is outdated. You bought a shirt with a vinyl graphic you hate. Whatever the reason, you need the vinyl off — and you need the shirt intact on the other side. Vinyl removal is absolutely achievable on most shirts with the right method and the right amount of patience. The wrong method, applied too fast, ruins the shirt. This guide gives you every method, ranked from safest to most aggressive, so you choose the right one for your fabric and vinyl type.
Who this guide is for: anyone removing heat transfer vinyl (HTV), iron-on vinyl, Cricut vinyl, screen-printed vinyl, or transfer decals from cotton t-shirts, polyester shirts, hoodies, tank tops, and blended fabrics.
Before You Start — What You Need to Know
Not All Vinyl Is the Same
The removal difficulty depends almost entirely on what type of vinyl is on the shirt. Here are the four main types and what to expect:
|
Vinyl Type |
What It Is |
Removal Difficulty |
Best Method |
|
Heat Transfer Vinyl (HTV) |
Thin vinyl sheet applied with heat and pressure |
Moderate |
Heat gun or iron method |
|
Iron-On Transfer |
Pre-printed iron-on design |
Moderate |
Heat gun or iron method |
|
Screen-Printed Vinyl / Plastisol |
Thick ink printed directly on fabric |
Hard to remove completely |
Solvent + scraping; residue likely |
|
Cricut Vinyl (adhesive) |
Pressure-sensitive vinyl applied with heat or adhesive |
Moderate |
Heat gun + Goo Gone |
|
Rhinestone / Glitter HTV |
Textured HTV applied with heat press |
Moderate-Hard |
Heat method; may leave backing residue |
|
Puff Vinyl |
Foam-expanded vinyl; applied with heat |
Hard |
Heat method; may damage fabric when peeling |
⚠ Screen-printed designs are NOT vinyl — they are ink printed directly into the fabric fibers. Ink-based screen printing cannot be fully removed without damaging the shirt. This guide focuses on vinyl (heat transfer vinyl, iron-on, and HTV) removal. If your design has no edge you can lift, it is likely screen-printed ink, not removable vinyl.
Know Your Fabric Before You Start
The fabric of the shirt determines which methods are safe. Using the wrong solvent or too much heat on the wrong fabric can damage or discolor the shirt permanently:
|
Fabric Type |
Safe Methods |
Methods to Avoid |
Notes |
|
100% Cotton |
All methods — heat, solvents, freezer |
High heat on thin cotton |
Most forgiving fabric for vinyl removal |
|
Polyester |
Heat method (low-medium); Goo Gone |
High heat — melts polyester |
Heat at 250°F max; avoid irons set to cotton |
|
Cotton-Poly Blend |
Heat method; Goo Gone; rubbing alcohol |
High heat on poly side |
Test solvent on an inside seam first |
|
Tri-Blend (poly/cotton/rayon) |
Low heat only; Goo Gone |
Acetone; high heat |
Rayon is heat-sensitive — use hair dryer only |
|
Nylon / Athletic Fabric |
Goo Gone; rubbing alcohol only |
Heat above 250°F |
Nylon melts at relatively low temperatures |
|
Fleece / Hoodie |
Heat method; Goo Gone |
Soaking with solvents |
Fleece loops can pull when peeling — go slow |
Shopping for a fresh blank after a removal job gone wrong? Explore cotton t-shirts, pullover hoodies, and tank tops at Simplstc Apparel — available blank with no minimum.
Tools You Will Need
Before starting, gather the following. Having everything ready before you begin prevents you from stopping mid-removal with vinyl half-peeled — which makes the job harder.
-
Heat source (one of): heat gun (preferred), clothes iron, or hair dryer on highest heat setting
-
Tweezers or fingernails: for lifting the corner of the vinyl without direct finger contact with hot surfaces
-
Goo Gone or adhesive remover: for breaking down remaining adhesive residue after vinyl removal
-
Rubbing alcohol (isopropyl, 90%+): alternative to Goo Gone; effective on most residue types
-
Acetone / nail polish remover: for stubborn residue on cotton only — do NOT use on polyester, nylon, or blended fabrics
-
Old towel or cloth: to place between the iron and the shirt if using an iron method
-
Plastic scraper or old credit card: for scraping residue after solvent application
-
Freezer bag (optional): for the freezer method on brittle or older vinyl
7 Methods to Remove Vinyl from a Shirt — Ranked Safest to Most Aggressive
Method 1: Heat Gun (Recommended — Best for Most Shirts)
Best for: HTV, iron-on vinyl, Cricut vinyl on cotton, cotton-poly, and fleece. The heat gun is the most controlled heat method for vinyl removal — you can direct heat precisely and adjust distance for different fabrics.
What you need: heat gun, tweezers
-
Set your heat gun to the low or medium setting (250–350°F for polyester-containing fabrics; up to 400°F for 100% cotton).
-
Lay the shirt flat on a hard surface — not on a soft surface like a bed, which absorbs heat rather than reflecting it back into the vinyl.
-
Hold the heat gun 2–4 inches from the vinyl surface. Move it in slow circles over the vinyl — do not hold it stationary or you will scorch the fabric.
-
After 20–30 seconds, the vinyl will begin to soften and lose its grip on the fabric. Test by lifting a corner with tweezers or your fingernail.
-
When the corner lifts cleanly without pulling fabric fibers, begin peeling from the corner in a slow, steady motion parallel to the fabric surface — not straight up, which can stretch and tear the fabric.
-
If the vinyl resists at any point, stop pulling and reapply heat before continuing. The vinyl must be warm to release cleanly.
-
Once the main vinyl piece is removed, apply Goo Gone or rubbing alcohol to any remaining adhesive residue. Let it sit 30 seconds, then wipe away with a cloth.
-
Wash the shirt in cold water to remove any remaining solvent residue before wearing.
⚠ Never hold the heat gun stationary on one spot for more than 3 seconds. Sustained heat in one spot scorches fabric instantly — especially polyester and blended fabrics.
Method 2: Clothes Iron (Good for HTV — Most Common at Home)
Best for: HTV and iron-on vinyl on cotton shirts. Most accessible method for home use — no heat gun required. Slightly harder to control than a heat gun because the iron covers a larger area.
What you need: clothes iron, thin cloth (pillowcase or parchment paper), tweezers
-
Turn the shirt inside out. Place it so the reverse side of the vinyl decoration faces up.
-
Set your iron to the cotton or high setting. For polyester-containing shirts, set to medium.
-
Place a thin cloth (old pillowcase, parchment paper) over the vinyl area — direct iron-to-vinyl contact can make vinyl stick to the iron.
-
Press the iron firmly over the area for 10–15 seconds. Lift the iron — do not slide it back and forth.
-
Remove the cloth quickly while the fabric is still hot. Begin peeling from the edge of the vinyl with tweezers — the vinyl should lift away from the fabric easily.
-
For larger vinyl pieces, work in sections: iron an area, peel that section, move to the next section.
-
Apply rubbing alcohol or Goo Gone to adhesive residue. Wipe clean. Wash in cold water.
Method 3: Hair Dryer (Safest Method — Best for Delicate Fabrics)
Best for: polyester, tri-blend, nylon, and athletic fabrics where a heat gun risks too much direct heat. The hair dryer delivers lower, more diffuse heat — takes longer but is safest on heat-sensitive fabrics.
What you need: hair dryer on highest setting, tweezers
-
Set hair dryer to the highest heat setting.
-
Hold 1–2 inches from the vinyl. Move in circles over the graphic for 45–60 seconds — longer than with a heat gun because the temperature is lower.
-
Test a corner with tweezers. If the vinyl lifts without pulling fabric, begin peeling slowly.
-
Reheat as needed throughout the process. Hair dryer heat dissipates faster than heat gun heat — the vinyl will cool and restick more quickly.
-
Remove residue with Goo Gone. Wash in cold water.
Method 4: Goo Gone / Adhesive Remover (Best for Residue)
Best for: removing adhesive residue left after the main vinyl piece has been removed. Also effective on thin, poorly-adhered vinyl as a primary removal method.
What you need: Goo Gone or similar adhesive remover, plastic scraper or old credit card, cloth
-
Apply a generous amount of Goo Gone directly to the vinyl or residue.
-
Let it penetrate for 1–2 minutes. The adhesive remover breaks down the bond between the vinyl adhesive and the fabric fibers.
-
Use a plastic scraper or old credit card to gently scrape the softened vinyl or residue from the fabric surface. Work from the edge inward.
-
Wipe with a clean cloth. Reapply and repeat if residue remains.
-
Wash the shirt thoroughly in warm water with dish soap to remove the Goo Gone completely before wearing.
⚠ Goo Gone can discolor certain dyes on dark-colored shirts. Always test on an inside seam or hidden area before applying to a visible portion of the shirt.
Method 5: Rubbing Alcohol / Isopropyl Alcohol
Best for: adhesive residue removal; also effective on thin or already-loosening vinyl. Works on most fabric types including polyester and tri-blend. The safest solvent option for most shirts.
What you need: 90%+ isopropyl rubbing alcohol, cloth or cotton balls
-
Soak a cloth or several cotton balls with rubbing alcohol.
-
Press firmly onto the vinyl or residue area and hold for 30–60 seconds — the alcohol needs time to penetrate and break down the adhesive.
-
While the fabric is still wet with alcohol, attempt to peel or scrape the vinyl from a corner. The alcohol weakens the adhesive bond.
-
For residue, rub firmly with the alcohol-soaked cloth in a circular motion.
-
Wash in cold water to remove all alcohol residue.
Method 6: Acetone / Nail Polish Remover (For Stubborn Residue — Cotton Only)
⚠ COTTON ONLY. Acetone dissolves synthetic fibers including polyester, nylon, rayon, and spandex. Do not use acetone on any shirt that is not 100% cotton. Test on an inside seam first.
What you need: acetone-based nail polish remover, cotton balls, cloth
-
Flip the shirt inside out to work from the reverse side of the vinyl if possible.
-
Soak a cotton ball with acetone. Press onto the residue area and hold for 30 seconds.
-
Scrub gently in a circular motion. The acetone breaks down the adhesive polymer.
-
Wipe away dissolved residue with a clean cloth.
-
Wash the shirt immediately in cold water. Do not let acetone sit on fabric longer than 2 minutes.
Method 7: The Freezer Method (For Old, Brittle Vinyl)
Best for: old, aged HTV or iron-on vinyl that has become stiff and brittle over time. Older vinyl loses flexibility and cracks — freezing makes it even more brittle, allowing it to be peeled and cracked off in pieces. Less effective on newer, flexible vinyl.
What you need: freezer bag, freezer, fingernails or stiff brush
-
Place the shirt in a freezer bag to keep it dry. Seal the bag.
-
Place in the freezer for 1–2 hours. The vinyl will become hard and brittle.
-
Remove from freezer and work quickly while the vinyl is still cold.
-
Use your fingernails, a stiff brush, or a plastic scraper to crack and peel the brittle vinyl from the fabric surface.
-
The vinyl should crack and come off in chips and pieces. Work quickly — as the shirt warms up, the vinyl becomes flexible again.
-
Apply rubbing alcohol to any adhesive residue that remains. Wash in cold water.
-
Repeat the freezer process if needed for multiple sessions on a large vinyl graphic.
Which Method to Use — Quick Decision Guide
|
Your Situation |
Best Method |
Why |
|
Fresh HTV on cotton shirt |
Heat gun or iron |
Heat is the fastest and cleanest method for new HTV |
|
HTV on polyester shirt |
Hair dryer |
Lower controlled heat prevents fabric damage |
|
HTV on hoodie or fleece |
Heat gun on low |
Fleece loops require gentle, controlled heat |
|
Old vinyl that's cracking |
Freezer method |
Cold makes brittle vinyl easier to crack off |
|
Vinyl removed but residue left |
Goo Gone or rubbing alcohol |
Adhesive remover targets the adhesive layer specifically |
|
No heat gun available |
Iron method |
Most accessible home method for HTV |
|
Delicate fabric (tri-blend, nylon) |
Hair dryer + Goo Gone |
Lowest heat risk; solvent handles adhesive |
|
Stubborn residue on 100% cotton |
Acetone |
Most effective solvent for cotton; dangerous on synthetics |
|
Cricut vinyl on cotton |
Heat gun + Goo Gone |
Heat releases the bond; Goo Gone handles the adhesive |
|
Multiple vinyl layers |
Heat gun, layer by layer |
Remove one layer at a time — never try to pull multiple layers simultaneously |
After Vinyl Removal — What to Expect & How to Fix It
Residue Left on the Shirt
Adhesive residue is normal after vinyl removal — almost every vinyl removal leaves some adhesive ghost on the fabric. This is not permanent. Apply rubbing alcohol or Goo Gone, let it sit for 60 seconds, then rub firmly with a cloth. Repeat 2–3 times for stubborn residue. A thorough wash in warm water with dish soap will remove any remaining traces.
Discoloration or Color Change
Some shirts develop a slightly different sheen or color tone where the vinyl was — the vinyl blocked UV light and normal washing for however long it was applied, leaving the covered area looking slightly different from the rest of the shirt. This difference usually fades with several washes. If the discoloration is significant and does not wash out, the shirt was likely exposed to too much heat during the vinyl application process, not the removal process.
Fabric Texture Change
The area where vinyl was applied may feel slightly different from the surrounding fabric — slightly rougher or stiffer — after removal. This is residual adhesive that was not fully removed. Additional applications of Goo Gone or rubbing alcohol followed by thorough washing will typically resolve this. If the texture change is severe, the vinyl adhesive has bonded deeply into the fabric fibers — a situation most common with very old HTV (3+ years) that has heat-cured into the fabric over time.
Ghosting (Outline of the Vinyl Visible)
'Ghosting' — the visible outline of where the vinyl was — occurs because the vinyl blocked fading, washing, and sun exposure on the covered fabric area. The fabric under the vinyl is newer-looking than the surrounding fabric. This is not a removal error. The difference fades with additional washing and sun exposure over time. For shirts used in programs where the graphic needs to be fully removed without visible traces, consider replacing the shirt rather than removing the vinyl.
7 Vinyl Removal Mistakes That Ruin Shirts — and How to Avoid Them
-
Pulling cold vinyl straight up: vinyl must be warm and soft to release from fabric cleanly. Pulling cold vinyl straight up tears fabric fibers and leaves adhesive behind. Always heat first; always peel at an angle parallel to the fabric surface.
-
Using acetone on polyester: acetone dissolves synthetic fibers. One application of acetone on a polyester shirt creates a hole or discolored patch that cannot be undone. Use rubbing alcohol or Goo Gone on synthetic fabrics.
-
High heat on polyester: polyester melts and distorts at high temperatures. A heat gun at cotton settings on a polyester shirt will create permanent scorch marks or melt the fabric surface. Use hair dryer heat on polyester.
-
Rushing: vinyl removal done fast is vinyl removal done wrong. Moving too quickly pulls fabric fibers, leaves more residue, and risks scorching with sustained heat in one spot. Work slowly, section by section.
-
Using a direct iron on vinyl: placing a hot iron directly on HTV can bond the vinyl to the iron's plate. Always use a pressing cloth (old pillowcase, parchment paper) between the iron and the shirt.
-
Skipping the residue step: removing the main vinyl piece and considering the job done leaves adhesive residue that collects lint and discolors. Always finish with a solvent step and a wash.
-
Trying to remove screen-printed ink: screen-print ink is printed into the fabric fibers, not adhered on top of them. It cannot be removed with the methods in this guide. Attempting it damages the shirt without removing the design.
When to Replace the Shirt Instead of Removing the Vinyl
Vinyl removal works on most shirts in most situations — but there are specific cases where replacing the shirt is more practical than spending time on a removal job that won't produce a usable result.
-
The vinyl has been on for more than 3–4 years: HTV bonds more deeply into fabric fibers over time with repeated washing and heat exposure. Very old HTV often leaves permanent adhesive staining and texture changes even after successful removal.
-
The shirt is polyester and the vinyl is large: removing large vinyl pieces from polyester shirts requires extended, careful low heat — for a cheap polyester shirt, the time investment often exceeds the cost of a replacement.
-
Multiple vinyl layers: shirts with layered vinyl (a new design applied over an old one) often have adhesive from both layers bonded into the same area of fabric, making clean removal very difficult.
-
Screen-printed design (not vinyl): as noted above, screen printing cannot be removed. If the design has no liftable edge, it is likely printed into the fabric.
-
The shirt itself is damaged: if the shirt has other wear, pilling, or damage, investing time in vinyl removal is unlikely to produce a shirt worth wearing.
When replacing makes more sense than removing, explore blank t-shirts at Simplstc Apparel — cotton t-shirts starting under $3 per unit at volume, pullover hoodies from leading brands, and short sleeve tees in 30+ colors. No minimum on blank styles.
Avoid the Problem Next Time — Better Decoration Options Than HTV
Heat transfer vinyl is popular for small quantities and custom designs — but it has a known limitation: it eventually peels, cracks, and requires removal. If you are dealing with vinyl removal because your previous decoration method failed, here are the professional wholesale alternatives that last significantly longer:
Screen Printing — The Most Durable Decoration Method
Screen-printed ink penetrates the fabric fibers rather than sitting on top of them — properly screen-printed designs last the life of the garment and cannot be peeled or removed. Screen printing is the right choice for programs of 12+ units with 1–6 solid colors. Explore our screen printing service.
DTF Printing — Full-Color Without the Peeling Risk
DTF (direct-to-film) printing transfers a printed design using a heat press — similar to HTV application, but using a professional-grade process that produces significantly better adhesion and wash durability than consumer HTV products. DTF handles unlimited colors, gradients, and photographic images. Explore our DTF printing service.
Embroidery — The Permanently Stitched Alternative
Embroidery stitches the design directly into the fabric — it cannot peel, crack, or lift, because it is part of the fabric structure. Embroidery is the premium option for logos on polos, hoodies, and bags where a stitched logo communicates professional quality. Explore our embroidery service.
Decoration Method Comparison
|
Method |
Durability |
Best For |
Min Qty |
|
Consumer HTV / Iron-On |
3–5 years; cracks and peels |
DIY, 1–5 pieces, personal use |
1 piece |
|
Professional Screen Printing |
Life of garment; ink in fabric |
Events, teams, brands — 12+ units |
12 pieces |
|
Professional DTF Printing |
5–7+ years; much better than HTV |
Complex graphics, all fabrics, low qty |
1 piece |
|
Embroidery |
Life of garment; stitched in |
Corporate logos, polos, hats, bags |
12 pieces |
FAQs — How to Remove Vinyl from a Shirt
What is the best way to remove vinyl from a shirt?
The best method for most shirts is the heat gun method: apply heat at 2–4 inches from the vinyl surface, wait 20–30 seconds until the vinyl softens, then peel slowly from a corner at an angle parallel to the fabric surface. Use Goo Gone or rubbing alcohol to remove any remaining adhesive residue. Wash in cold water.
How do you remove heat transfer vinyl (HTV) from a shirt?
Apply direct heat from a heat gun, hair dryer (on highest setting), or clothes iron to the vinyl until it softens — approximately 20–30 seconds for a heat gun, 45–60 seconds for a hair dryer. Peel from a corner slowly while the vinyl is still warm. If it resists, reheat before pulling. Remove adhesive residue with Goo Gone or rubbing alcohol.
How do you remove vinyl from a polyester shirt without damaging it?
Use a hair dryer (not a heat gun) on a polyester shirt — hair dryer heat is lower and more diffuse, reducing the risk of melting or distorting synthetic fibers. Set to the highest heat setting and hold 1–2 inches from the vinyl for 45–60 seconds. Peel slowly. Use rubbing alcohol or Goo Gone for residue — never use acetone on polyester.
How do you remove vinyl from a shirt without a heat gun?
Use a clothes iron set to the cotton setting. Place a thin cloth (pillowcase or parchment paper) between the iron and the shirt. Press firmly on the area for 10–15 seconds. Remove the cloth while hot and immediately peel the vinyl from a corner with tweezers. If no iron is available, a hair dryer on the highest setting also works — it takes longer but is effective.
How do you remove old vinyl from a shirt?
Old, brittle vinyl is best removed with the freezer method: place the shirt in a sealed freezer bag, freeze for 1–2 hours, then quickly crack and peel the brittle vinyl off while the shirt is still cold. Old vinyl that is still flexible responds to the heat method — it may just take longer to release than newer vinyl.
How do you remove vinyl residue from a shirt?
Apply Goo Gone or 90%+ isopropyl rubbing alcohol directly to the adhesive residue. Let it sit for 30–60 seconds to penetrate the adhesive. Rub firmly with a cloth or scrape gently with a plastic card. Repeat as needed. Wash the shirt thoroughly with dish soap and warm water after residue removal.
Can you remove screen-printed designs from a shirt?
Screen printing is ink printed into the fabric fibers — not vinyl applied on top. It cannot be removed with the heat or solvent methods in this guide. If your shirt's design has no liftable edge (you cannot get a fingernail under any part of it), it is screen printed and cannot be removed without damaging the shirt.
What removes vinyl from a shirt without damaging the fabric?
The hair dryer method and Goo Gone method are the gentlest approaches. The hair dryer provides lower heat than a heat gun — safer for polyester and delicate fabrics. Goo Gone is a citrus-based adhesive remover that is safe on most fabric types (test on an inside seam first). Rubbing alcohol is the second safest solvent option.

Need Help?
Get in touch with our experts.